Showing posts with label Friendship is Magic. Show all posts

January 12, 2012

Awesome WIP from Panda!


I'm posting many times!  I can't believe it.  :)

Anyway - I just wanted to give a WIP pic of what I'm up to lately - I got a bug up my butt to try this.  With Xanthe's help. I might be able to pull this off!

;)  Here's my WIP!

December 17, 2011

Newest completion - The Cutie Mark Crusaders!

They're done!

They're finally done.

I present to you...the Cutie Mark Crusaders!


These little buggers have taken me far longer than I had expected, but they're done now and their commissioner loves them, which is what's important!


Here's Apple Bloom. She was made by heavily modifying a Twilight Sparkle figure.


Scootaloo is made from a Rainbow Dash, with her wings removed and new ones sculpted on.


Sweetie Belle was also made from a Rainbow Dash. All those stripes were a pain.

Keep an eye up for new commission information after Christmas!

December 10, 2011

My Little Pony - Christmas/Winter wear

Hello, my bronies!

I have been silent and busy with projects as of late, but today I bring you not only my first original crochet pattern, but a pattern meant for G4 My Little Pony brushable toys! Much to my surprise, it also seems to fit Little Pet Shop figures - at least it fit the kitty I used in place of an Earth Pony!


If you want to make it for an LPS animal, you can skip the ear-holes if the animal does not have them.

Hook this on Ravelry!


For this project, I recommend using hook F5.
For the main yarn, I highly recommend using Red Heart Shimmer, as I have exclusively used it. It is flexible and fits tightly together, to allow for it to fit on brushable My Little Ponies. For trim, suggested yarns are Red Heart Buttercup, Bernat Pipsqueak, or Bernat Boa. Any fuzzy yarn could be really great though!


Hat:
1: Chain 18 and join into round
2: sc 18 in round
3: sc 2, ch 4, count 4 st and re-attach, sc 4, ch 4, count 4 and re-attach, sc 2
4: 18 sc
5: sc 2tog, sc 1 * 6 times
6: sc 12 * 2 times
7: sc 4, sc 2 tog * 2 times
8: sc 10
9: sc 3, sc2tog * 2 times
10: sc 8

join trim color

11-12: sc 8
13: sc2tog * 4 times
14: Slip stitch until hat is closed

Close and sew yarn into hat. If you want the hat to fold over, use the end of the main color to sew it in to place and hold it down.

Hat, bottom trim:
Join at original starting area
1: sc 18 (If making the hat for a unicorn, sc 8, chain 2 and re-attach 2 st later, sc 8)

Depending on the yarn you're using for trim, you may want to add another row of 18. With Bernat Pipsqueak, I do.


Scarf

1: ch 25
2: ch 1, turn, dc 25
3: ch 1, turn, ch 6 and reattach at end of 6th st, sc 19
Finish and sew ends in

(The scarf works to stay in place by the opposite end looping through the loop created by the chaining, as seen in the picture below)


Scarf Trim on both sides

Attach at end of scarf
1: sc 4
2: ch 1, turn, sc 4
cut and sew in ends

Repeat for other end of scarf


Front boots:

1: magic loop sc 9
2-4: sc 9 in outer loop
cut and sew in ends


Back boots:
1: magic loop sc 10
2-4: sc 10 in outer loop
cut and sew in ends


If you are interested in this outfit, but do not know how to crochet, Panda and I will be selling these outfits for 15.00 as a set, or 5.00 for either a set of booties, a scarf or a hat. Please contact me at xanthestar@gmail.com if you are interested. The current colors I have in stock may fluctuate, but right now I have ...

Shimmer Yarn in the colors Hot Pink, Purple, Red and Turquoise for the main color.

Buttercup in White Coral, Bernat Pipsqueak in Whitey White and Funny Bunny, and Bernat Boa in Chick for the contrasting colors.

Please remember I am not guaranteeing I can make one for you, if demand turns out to be a little too high.

November 12, 2011

Works in Progress Update


Hello bronies,

It's been a while, but I'm still around and painting!

Just...hit some snags with some commissions, and have had less time lately.

Here are some WIP snapshots of what I've been up to.


Applebloom

The CMC Commission piece is taking me longer than expected!
Some work on a Pathfinder PC while watching my hubby run a game of the new Beginner's Box set.


A preview of a part of my Thanksgiving Exclusive...


Do you think Applejack grows pomegranates?

October 30, 2011

Halloween Twilight Blindbag Custom

While finishing up the Cutiemark Crusaders, I've had time to also finish my Twilight Sparkle Halloween exclusive!

I started on her well before Nightmare Night was released, so I didn't have Star Swirl the Bearded to go off of.
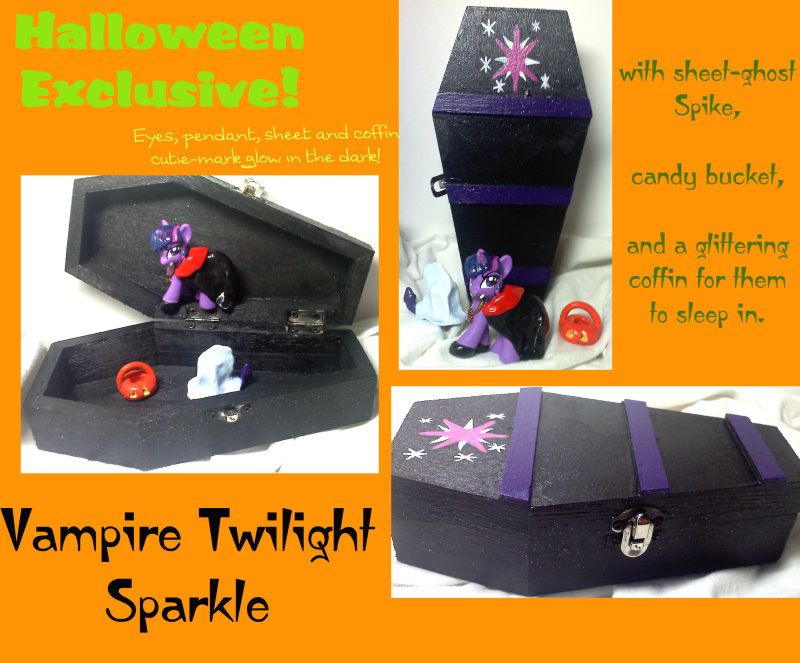


This one was a real project. Her body isn't varnished, though her cape and hair are - for some reason, the colors I mixed to make her purple shade separate when varnish touches them. I had to repaint her all over again!

The ebay auction is HERE

October 24, 2011

Work updates - commissions

I've been busy.

CMC commissions!


Rainbow Dash winter hat!

(image modified to protect my super secret identity!)


Celestia!


Twilight and a beholder:


Pathfinder Goblin Christmas Ornament!


October 20, 2011

Smartypants Plushie


Well, who's this?

Smartypants is up on Ebay!

Link

As soon as I saw the new episode I had to make one. She's too cute!

And the pattern was something I just made on the fly. She's only about 5" tall.

Not much else to say, but expect more crochet in the future.

Moar pics!


September 4, 2011

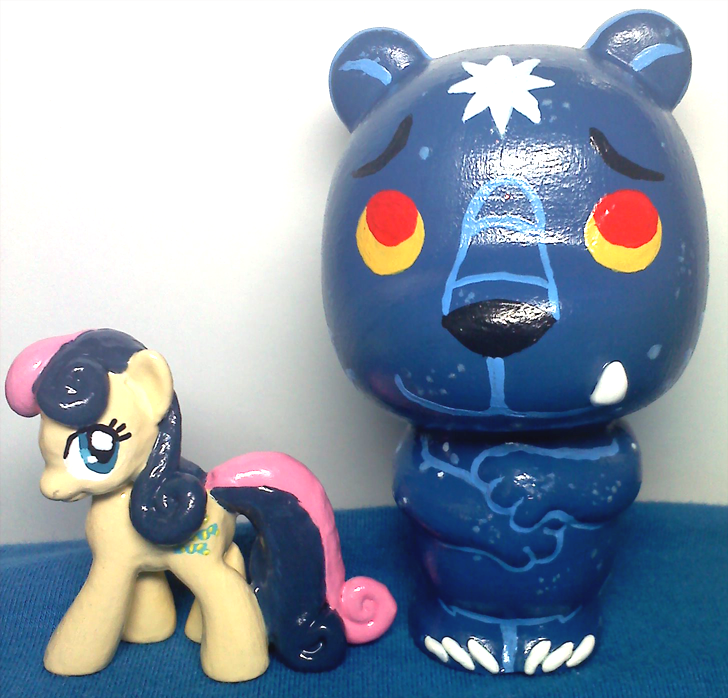
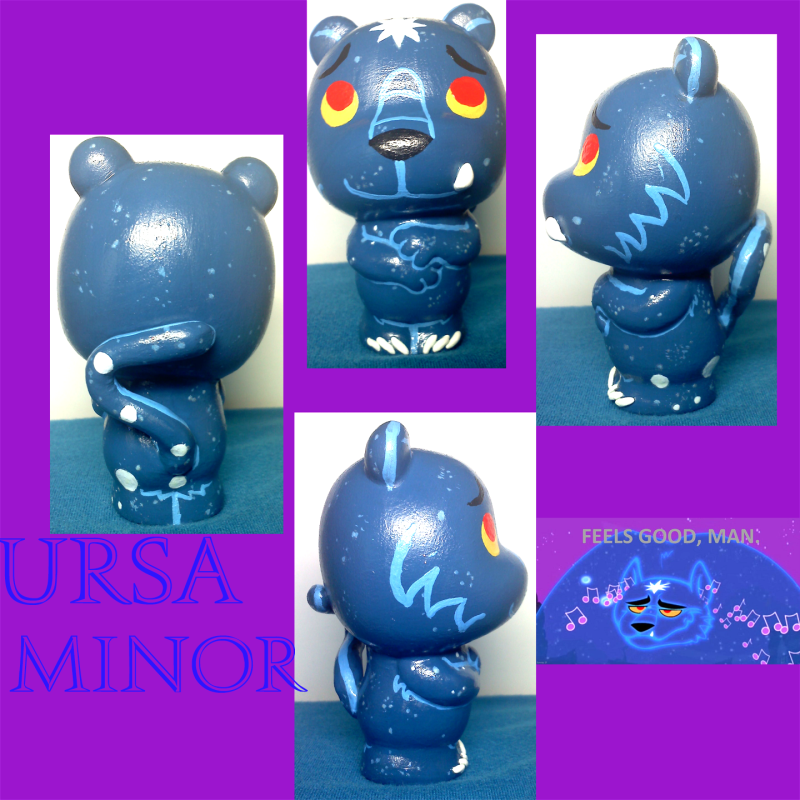
Ursa Minor Vinyl figure


This one is interesting!

While at the store one day I found blank vinyl figures for customizing. One was a bear! So I brought it home and looked it over, and it was suggested to me I make it an Ursa Minor.

So I did!

Here he is next to Bon Bon for a comparison of size. He is painted from acrylics, same as any of my blind bags, and also has glitter varnish over the groupings of stars.

Did I mention his stars and claws also glow in the dark?


Photographing him was a pain, though!

Ursa is for sale over here.

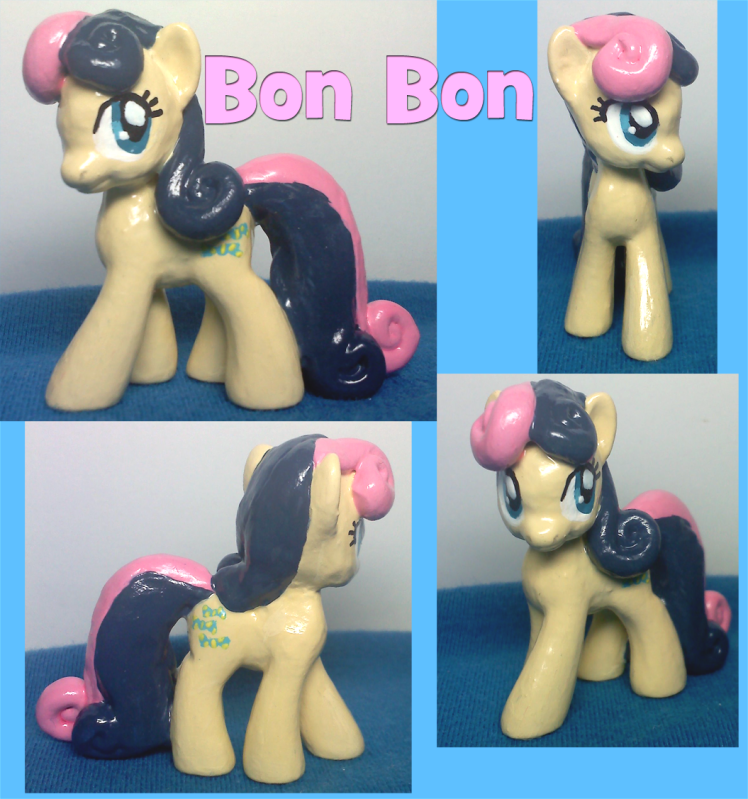
My Little Pony Friendship is Magic - Bon Bon Custom


Well, I've been asked to work on Bon Bon, and it struck me the other day how to do it. Once you pare down a miniature's hair, it's actually not so hard.

So here's Bon Bon!


Bon Bon is made from a modified Twilight Sparkle, with most of her mane removed. The mane and tail were built over with grey stuff for Bon Bon's new tail and mane. It's kind of easy, and really just involves rolling the putty up into curls....it's smoothing it together that's the hard part!

The picture below with Apple Bloom is the one I had to really work off of for her back. That and others suggest that her pink swirl extends only to her forelock, and turns into a blue mane.
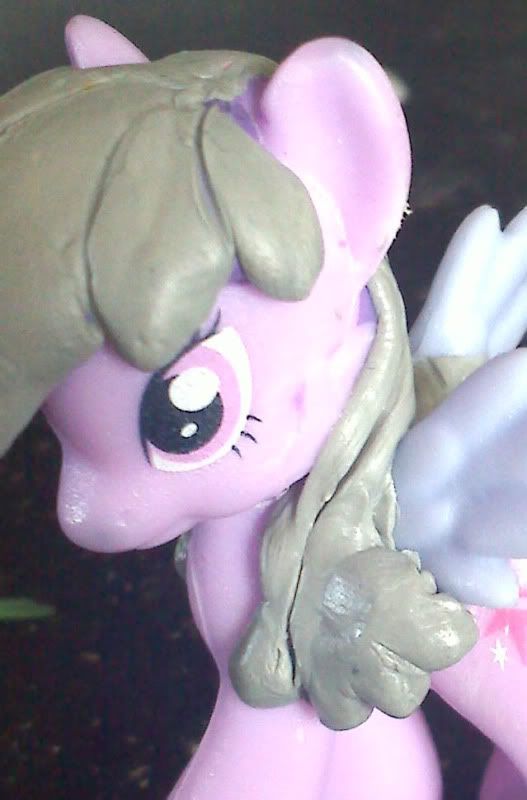
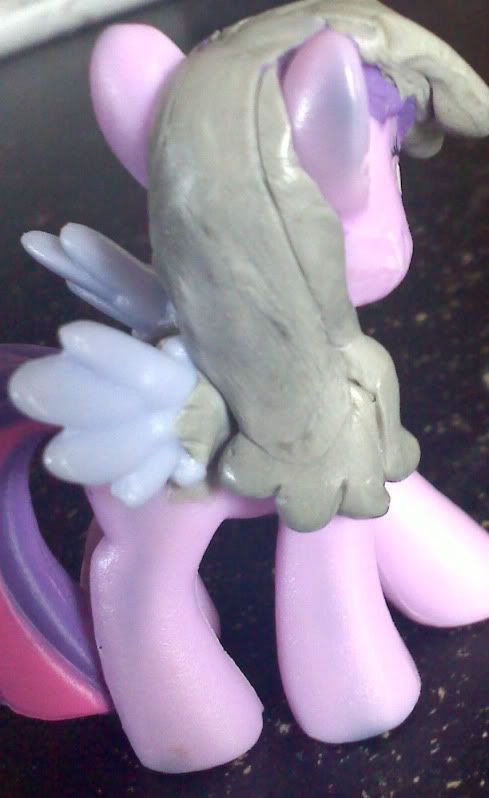
She's up on ebay here.

September 1, 2011

Puffcloud Custom Blind Bag - Part 3

Let's do this!

Last time we had finished the main part of Puffcloud's mane. The character has small bumps on hers though, and it seemed easiest to wait until the bulk was hardened before continuing.

This was done by making small balls with the greystuff, and carefully - with some moist fingers and a lot of caution - working it into the body of the mane so as to make it as seamless as possible.

Next, I moved to the tail. Puffcloud's picture (linked in the first post) shows that she has these same nubs on her tail...a total of four. Since Twilight's tail isn't radically different from hers, all had to do was once again add the nubs on.
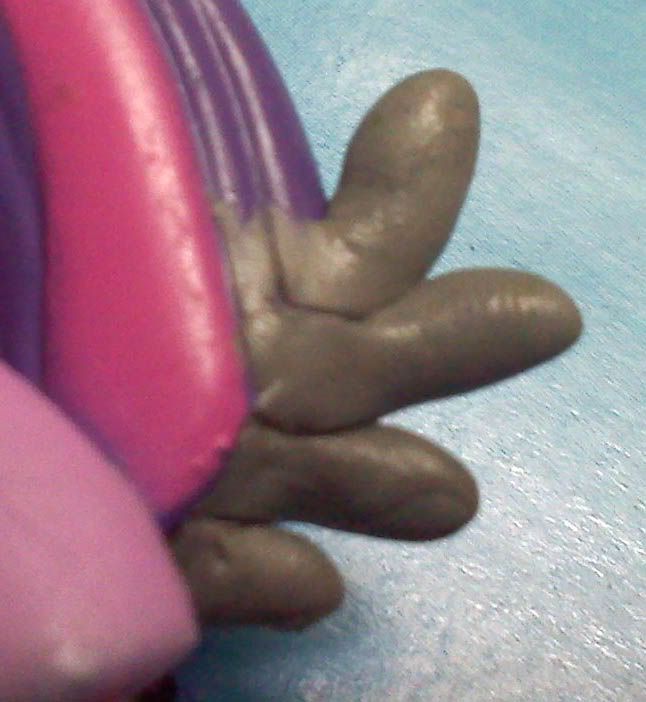
This is a hard process to follow, but I followed the same procedure. If you're not covering the base hair, it's best to work this extra in. I used an exacto knife to score along the lines of the figure's mane, to make it appear to be part of the initial mold.
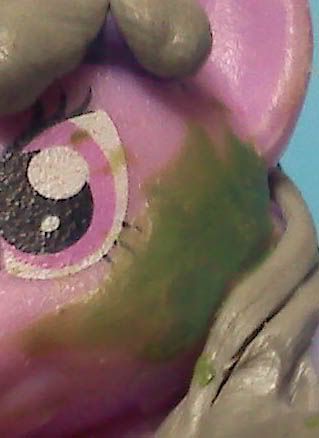
As seen before, the modification had left some scarring on parts of the plastic that were whittled down...mainly in areas I had to remove Twilight's mane. Using green stuff, which is generally easier to manipulate and thin into things, I covered this area with a small amount of green stuff and worked it around with wet fingers until it got as close to the surface of the toy as possible.
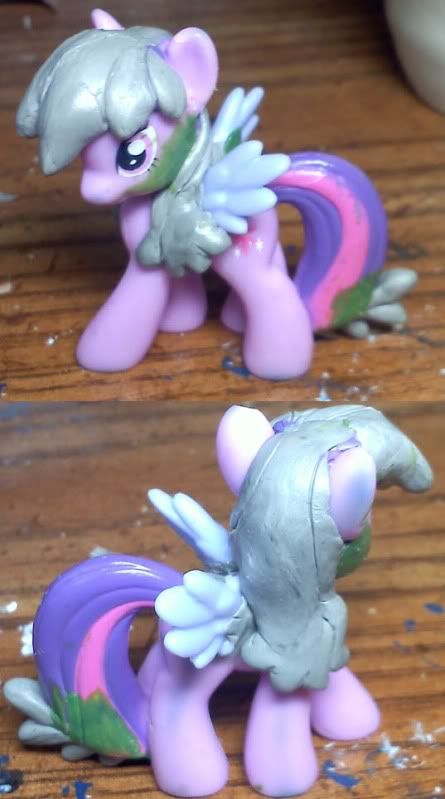
After using this method to repair the cheeks, part of the tail and the back of a wing, I let it set, and decide that this will be just fine!
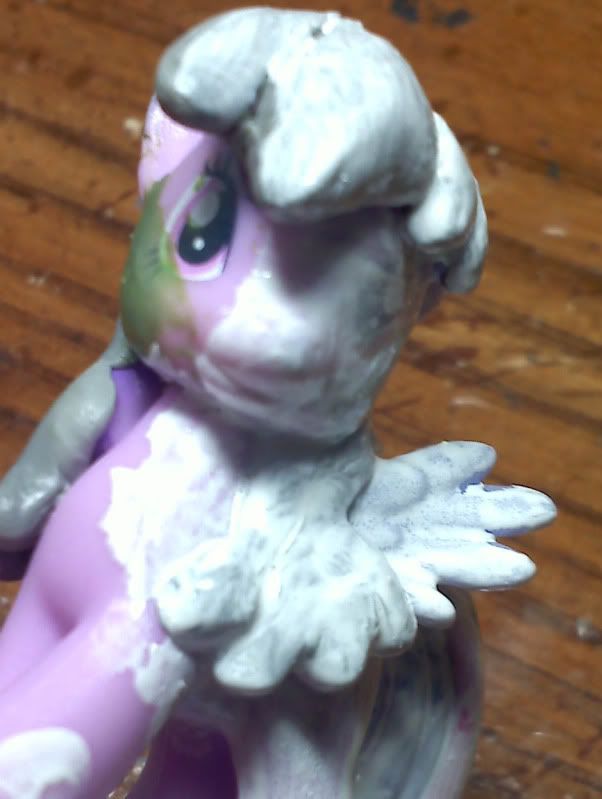
So, on to primer!

Once you're ready for primer, there are several choices. I am a fan of brush on primer, because of it's convenience and drying time. There's no right or wrong primer to use...the important thing it to use it right. Since Puffcloud is blue, I use a white primer.

Often times a brush on primer will require several coats, compared to a heavy, single coat of a spray on.
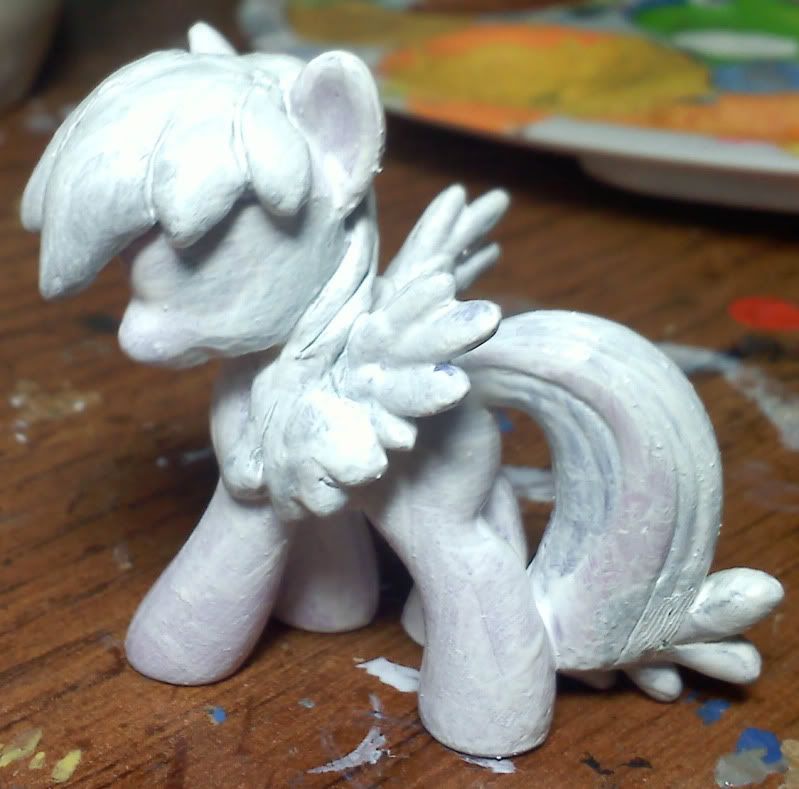

Only two coats so far...but it already looks far more uniform!

Next: basing and base paint coat!

August 27, 2011

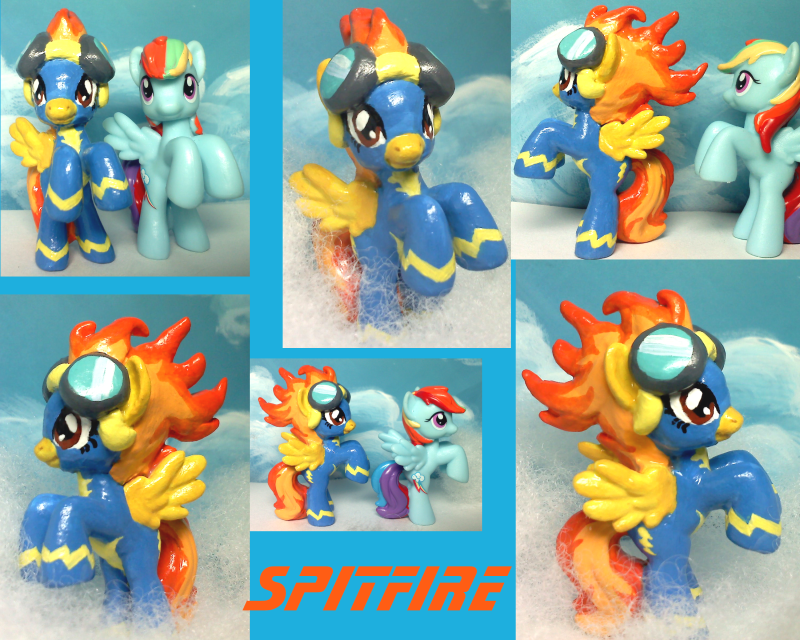
My Little Pony Custom Blind Bag: Spitfire


Another done!

This project has been around a few weeks waiting to be finished, so before I work more on the customs I wanted to finish her.

And here she is! Spitfire!

She was a pain! I used a Rainbow Dash base to make her, and cut away almost all of her mane and smoothed out her forehead.
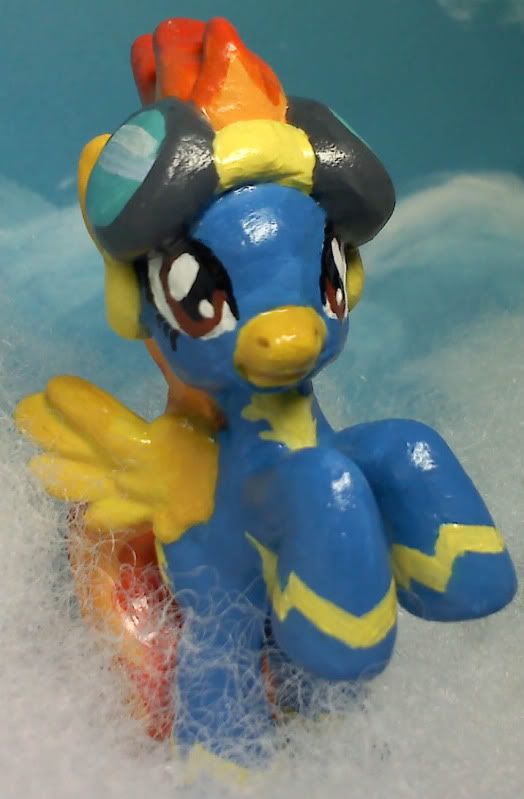
Her hair is made from pro-create (grey stuff), and I did something else. It's hard to see in these photographs, but I used greenstuff around her muzzle and wings to raise the area. In effect, it looks like her wings and muzzle are emerging from the costume.

She is for sale on Ebay here.

August 24, 2011

Puffcloud Custom Blind Bag - Part 2

Okay! On to part two.

Bare with me on this portion, guys! This is a hard part to make any sort of a tutorial about.

Last time, we pared down the plastic to make room for some sculpting. There are many kinds you can use. Personally, I like to use Grey Stuff for the modifications.

The top name brand of Grey Stuff is pro-create, but any two-part epoxy putty will do - Apoxie Sculpt, Green Stuff, Brown Stuff. They all have different properties, but I will go into that in a separate post!


When using epoxy putty, you will only have a certain amount of time to work with it...this varies depending on the mix you've created and what you are using.

To sculpt, you will need your fingers to be moist. Water will do fine, some people prefer vaseline!


After reviewing Puffcloud's character picture, I decided to try using the extra Lily Blossom wings I had from making Lyra! Since I had to destroy Twilight's mane on this side of the body, I used the grey-stuff for her mane to help support the wings.


At this point, I'm not worried if things look rough. After the putty sets and hardens, it can be filed down. But it's best to try and make parts as thin as possible near the seams - by wetting your fingers and stroking in one direction, you can easily thin out putty.

I then patched up the area on top of Puffcloud's hair, and begin to build up her hairstyle.

I smoothed up the design, working off of the pictures, and let the rest set to dry!

Again, don't worry about how rough things look at the start - there's lot of work to be done!