Showing posts with label Puffcloud. Show all posts

September 14, 2011

Puffcloud Custom Blind Bag - Part 5

We're getting closer guys, step by step!

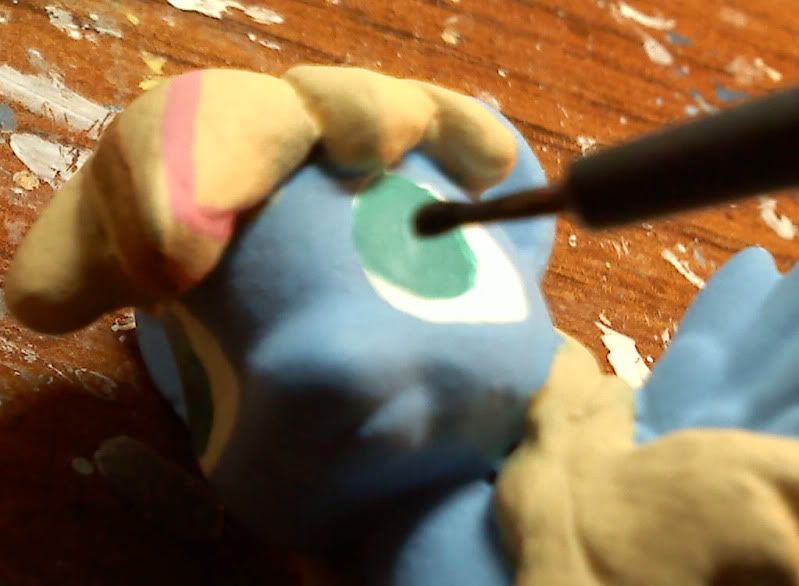
Onto the eyes!

When you are working on eyes, remember - smaller brushes are better, but also beware of ones that are too small. If you get one that is too small, the bristles may easily come displaced...and that makes accuracy harder to come by. Do some test eyes on paper, if you're unsure of the size to use. The last thing you want to do is make a big mistake and start all over!
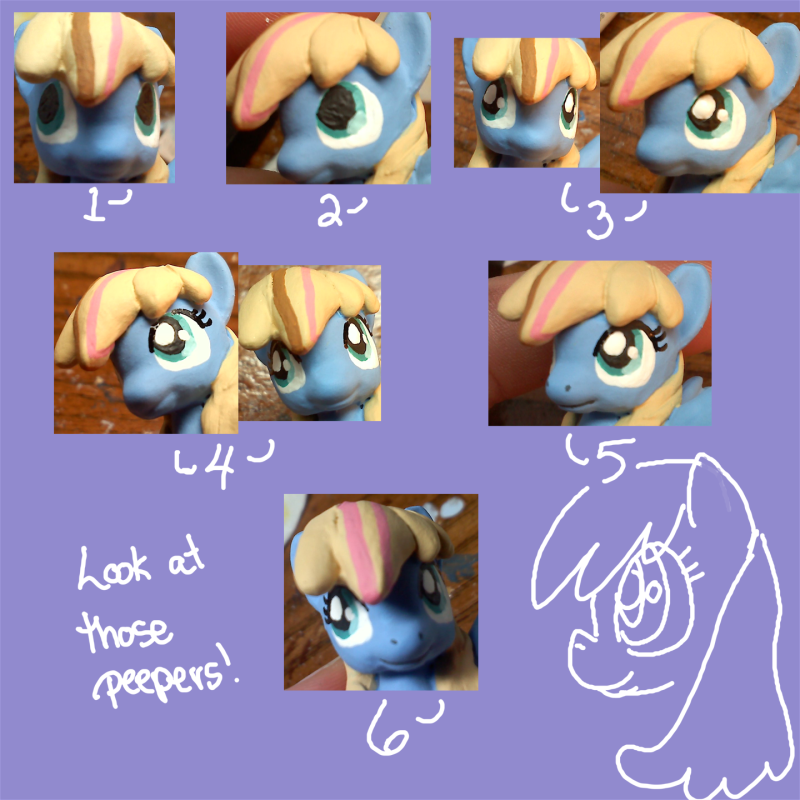


Next, let's follow the chart - I tried to make sure to take pictures of the process, so that it's a little more clear as to what to do:

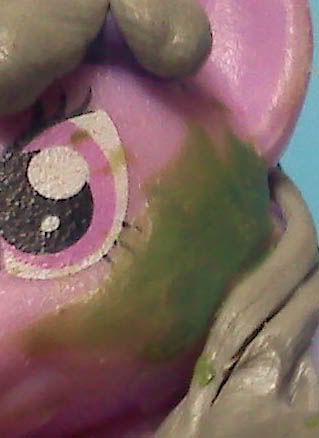
Step 1: The first thing I do is the pupils. On ponies, the pupils are very large, so use reference pictures! Make sure you have full coverage for the black, and do your best to smooth out the edges. If you make a mistake, use some of that eye color you saved earlier (Useful, right?) and make fixes once the paint dries.

Step 2: Highlights in the eyes are next. I prefer not to use the shadows that the show has at the top of the iris, but you certainly can if you think it looks better! Using white, I created a two lighter shades and layer them next to each other at the side of the eye.

Step 3: The eyes will look pretty dead until this part. Using reference and white paint, create the light reflections on the pony's eyes. Make sure to follow the expression you reference - most of the time, the reflections will be on the same spots on both eyes.

Step 4: Now it's time for the Sharpie extra-fine oil paint marker. You'll want to lightly press on the tip on paper until paint bleeds out, and make sure you have a controlled line. If you're even a little too hard on the Sharpie, it can begin to uncontrollably bleed - so treat it with care! Working off of your pony's eye shape and type, carefully draw out first the outline, then the eyelashes. If you can't reach a spot, don't force it - you might mark an area you don't want marked.

Step 5: Using your small brush, dip it lightly in black, and very carefully paint the areas you could not reach with the pen. Though the pen is a shiny paint, once everything is varnished you won't know they were done using different tools. Use this to fill any gaps.

Step 6: Look at the eyes from all angles, and if necessary use any of the colors you've saved to correct any errors. If you've saved colors, you'll have everything you need to fix your errors without completely re-starting the eyes.


Now, the eyes are finished!

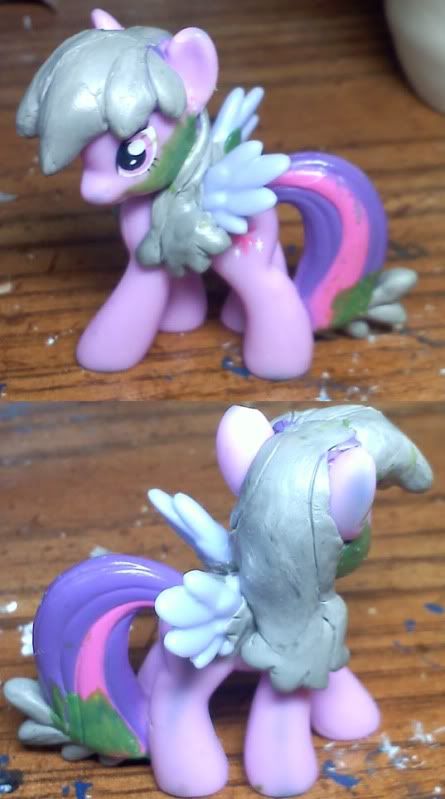
At this point, when I was working Puffcloud only a few more things needed to be done. After working with her for detail clarification, I made some changes to her mane colors. The final piece on the pony herself is then the cutie mark.
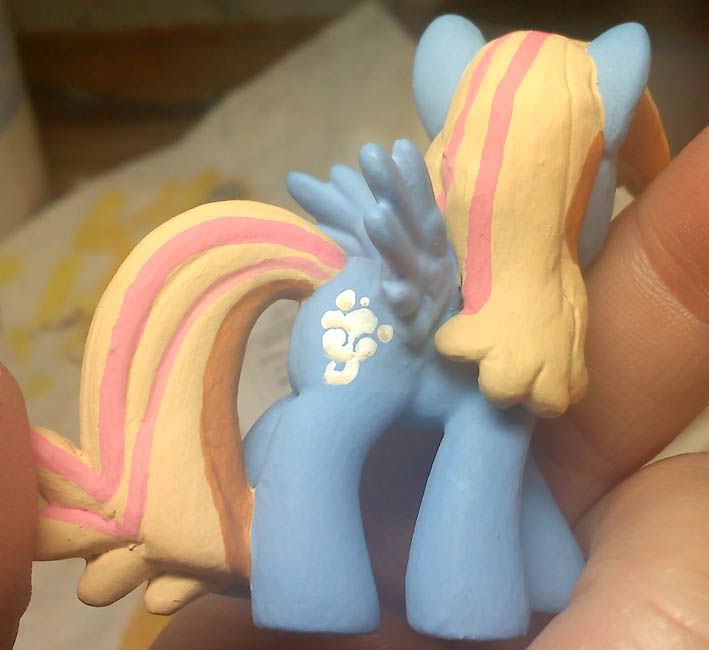

It's hard to explain the cutie mark, since it varies from figure to figure. But you need to get creative, and think careully if you're dealing with a detailed one.

In Puffcloud's case, since I had no more spare blue paint (I left it uncapped after following my own advice! :( ), I had to do the blue lines separating the clouds another way. So I used negative space, starting with only dots of white paint and working upward, making sure to leave lines between the areas it needed. Then, I shaded the necessary areas. If you're careful, you can get a lot of details in on these babies.

...at this point, the only thing left to do is varnish!
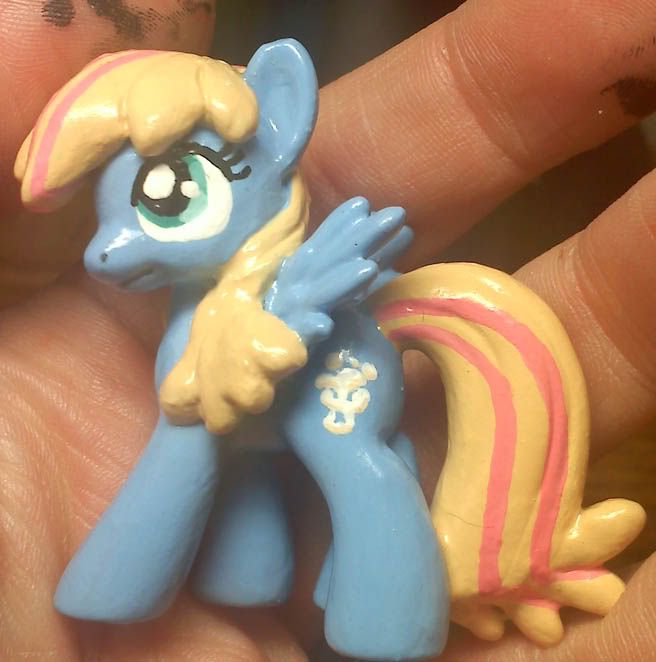

(Paint fingers!)

I prefer to use a satin varnish, but you might choose to use a matte/dull varnish. Matte varnish definitely photographs better, but satin looks very vibrant in person.

When applying it, make sure to do so evenly and do not be afraid to add several coats. Just make sure you have changed your water since painting. If you haven't, you might have a disaster on your hands!
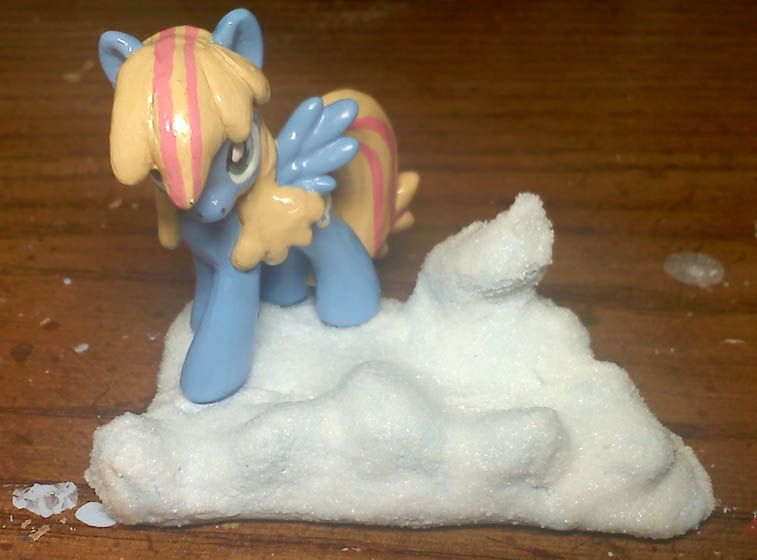
We're almost done...but not quite! Next, I will cover how to base a figure, as well as the construction of an accessory to finish out the figure!

September 12, 2011

Puffcloud Custom Blind Bag - Part 4

And here we go.

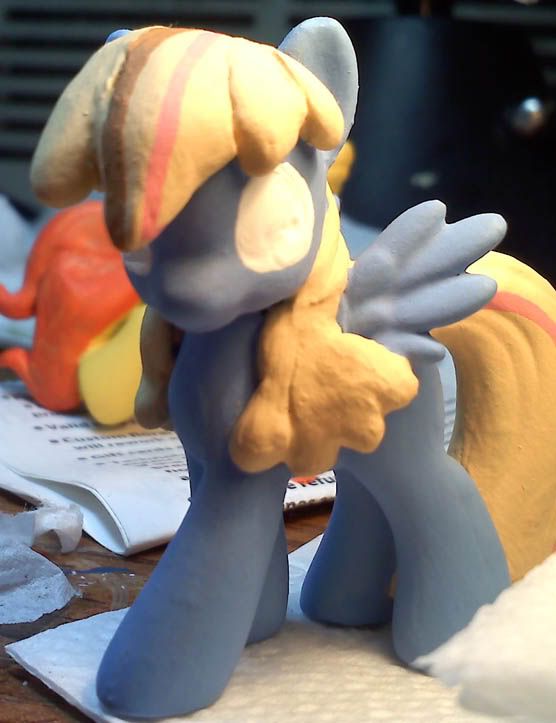
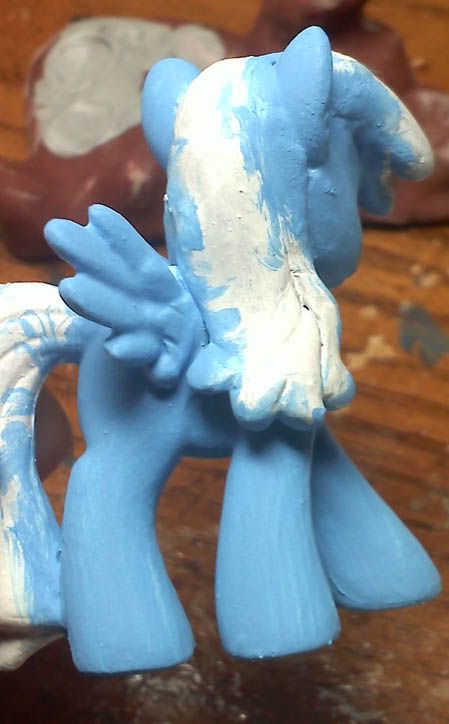
After priming Puffcloud, I mixed up her base paint coat. A good rule of thumb is to set aside some of your base paint color in a container that will keep it moist. If you make a mistake further down the line, you will want to be able to fix it without having to try and match up a custom mixed color.

You can see what I mean when I say the white primer is a little grainy. With a little work, tweezers and paint the issue is completely fixed...this is the only downside to reaper brush-on white. The black does not have this flaw.

For blind bags I can't stress enough how much it requires primer. Paint will run off of it unless it is now thinned.

Speaking of thinning, now is the time to thin your paint! Make sure you do so as you are mixing your color. Some paint product are milky, not clear, and this can affect the color if you don't take it into consideration.

Starting with the lowest layer (usually the body), begin layering several coats of paint. Thin them and wait for each layer to dry...if you try to put more paint over a layer still firming you might end up with brush marks.

Sometimes, a warm light will help speed up the drying time.

Make sure that as you layer up you get hidden spots. With the ponies, often behind the legs and between them can be harder to get coverage on.

Once your base coat is sufficiently thick and appears to be the level of coverage you're looking for, it's time to move on to the next layer - the mane.

Mix up your color, incorporating the thinner into it, and make sure to set some extra aside in a container! You might not be able to tell, but Puffcloud's mane contains purple. Be creative with your mixtures...sometimes a color you wouldn't expect will help to get the shade you want.

Like the base coat, work it up slowly with thin layers until you get the coverage you like. Expect there to be some paint loss if you handle this with your hands...that set aside paint will be very important.

Now, onto the eyes -

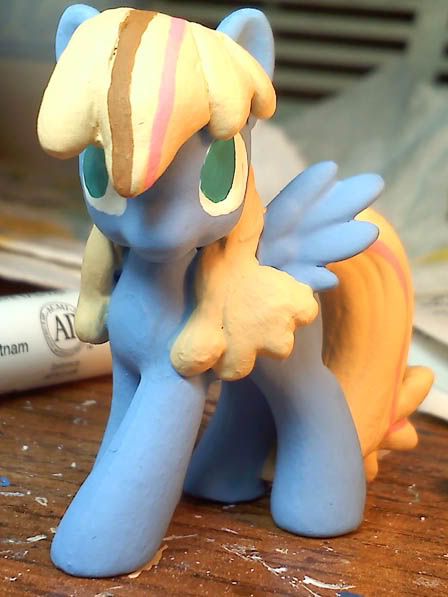
When I do eyes, as you can see I completely ignore the eyes that figure comes with. If you want a more show accurate figure, try to make the eyes larger than the blind bags have. In this case, I'm using the picture of Puffcloud here for reference as to her eye size - and taking a little creative liberty to make it appear best on the figurine.

Start with white paint, and using your brush paint the shape of the eyes and fill it. This is a good reason to have backup paint for your base coat - if you make a mistake, and shape it wrong, use this paint to correct your mistake.

An important part of this is to make sure that your figure's eyes line up from a front view as well as a side view. This is another reason bigger is better than smaller on these little ladies...bigger eyes look more show-accurate from the front.


Following this, decide what expression you want your character to have. I cannot reiterate enough to look at screenshots from the show of the expression you are attempting - the ponies have very specific designs, so if you vary too far you can make an enthusiastic pony look psychotic without even trying.

Using your pony's base iris color, fill in the eyes with a ratio you decide you like. Try to make this look as circular as you can, don't be afraid to use white to go over this if necessary and to fix your mistakes. Now's the time to do that, before you get too far!

The remaining eye tutorial - and finishing touches - coming soon.

Puffcloud Custom Blind Bag - Paint Supplies Review

And on to the painting!

Before we get too far into it, I'll go over some materials first:

Paints

Paints are fun!

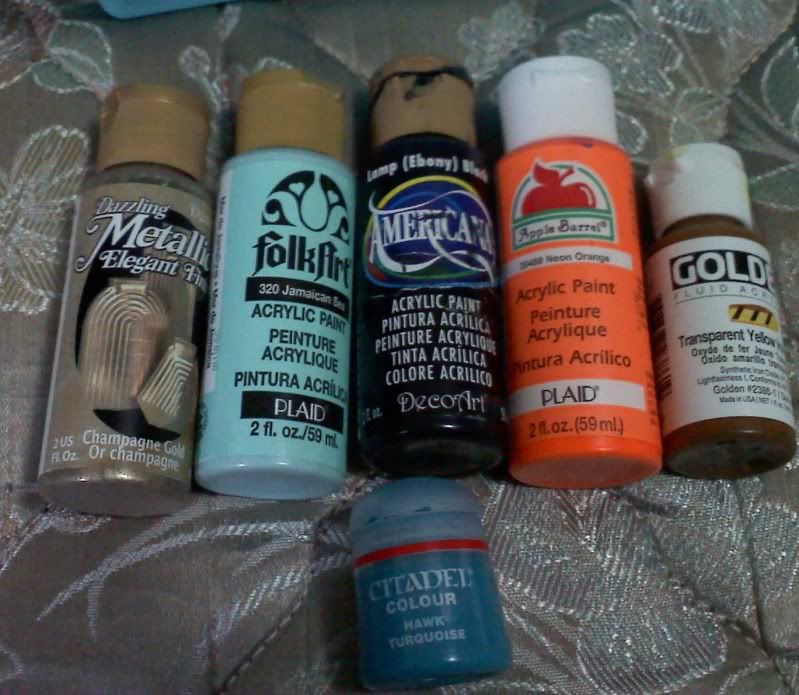
If you're working with something small, don't feel like you have to go with anything expensive, like Citadel. Citadel paints (bottom) are very, very quality, but the paint is far more expensive for the amount of paint that you get (approximately 3.00 for Citadel paints). The above paints - Folk Art, Americana, Apple Barrel, and Ceramcoat are far more common and cheaper.

They are often (not always) thicker...Folk Art especially, it seems to have a paste- like quality. For this reason, a paint thinner/flow improver is almost always a good idea.

Speaking of...

Accessories

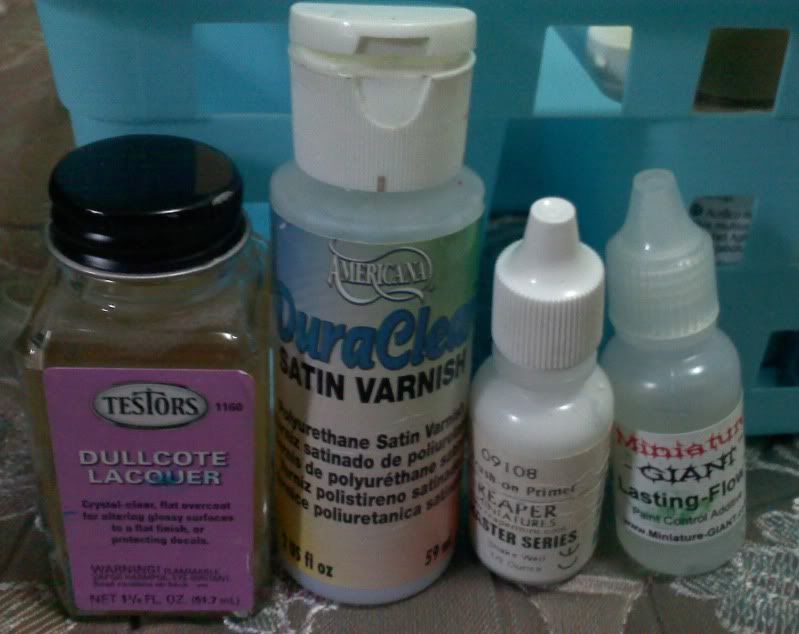
In painting with small figures, primer's super important. For my figures, I use Reaper's brush-on primer.

The most important part of painting with figures this small is making sure the paint is properly thinned. If you use paint straight out of the bottle the layer will be too thick, and will therefore cause streaks and clumps.

For this reason, I use this. Lasting Flow is a mix of a paint retardant and a flow improver. These things can be bought on their own, but this is a convenient pre-mixture meant for use on small figures.


Accessories

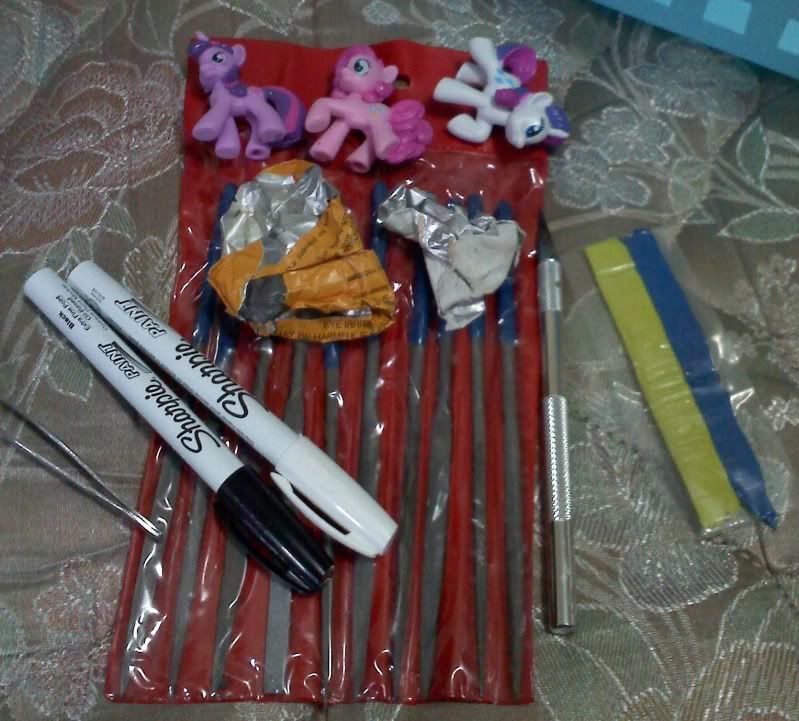
Ponies are obviously needed - the stuff in the torn up wrappers is gray stuff, or Pro Create, which is what I use to modify. The strip on the right is the green-stuff, which is also used to modify.

An exacto knife is what I use to cut through the manes/horns/wings. It cuts through vinyl pretty well. Tweezers are always useful, and in the middle are miniature-sized files. Though the vinyl from the ponies doesn't file well, sculpey and other clays take well to it.

The most important thing for the upcoming part are the sharpies. The black extra-fine oil paint Sharpie marker is important. This is what I use for the eyelashes on the ponies, and it's the easiest way to get a steady line without constant repair.

September 1, 2011

Puffcloud Custom Blind Bag - Part 3

Let's do this!

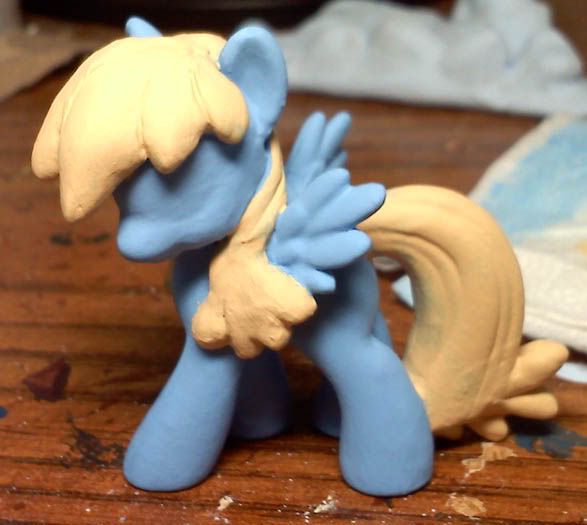
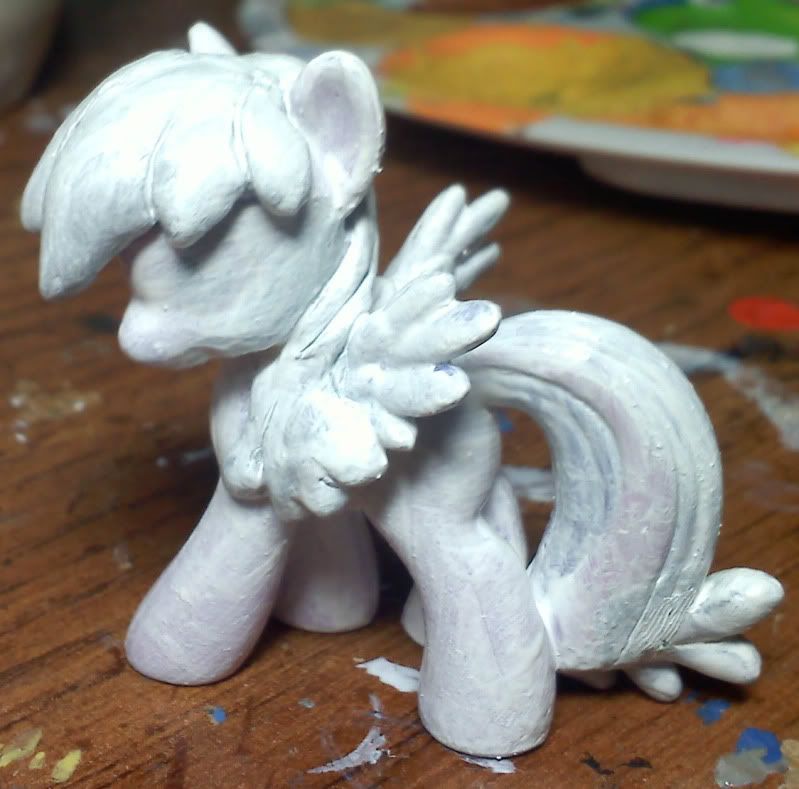
Last time we had finished the main part of Puffcloud's mane. The character has small bumps on hers though, and it seemed easiest to wait until the bulk was hardened before continuing.

This was done by making small balls with the greystuff, and carefully - with some moist fingers and a lot of caution - working it into the body of the mane so as to make it as seamless as possible.

Next, I moved to the tail. Puffcloud's picture (linked in the first post) shows that she has these same nubs on her tail...a total of four. Since Twilight's tail isn't radically different from hers, all had to do was once again add the nubs on.

This is a hard process to follow, but I followed the same procedure. If you're not covering the base hair, it's best to work this extra in. I used an exacto knife to score along the lines of the figure's mane, to make it appear to be part of the initial mold.

As seen before, the modification had left some scarring on parts of the plastic that were whittled down...mainly in areas I had to remove Twilight's mane. Using green stuff, which is generally easier to manipulate and thin into things, I covered this area with a small amount of green stuff and worked it around with wet fingers until it got as close to the surface of the toy as possible.

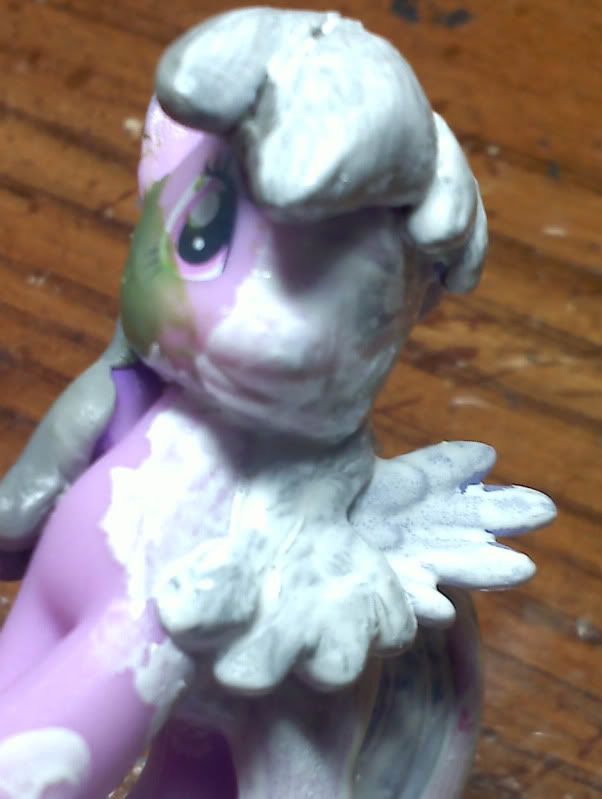
After using this method to repair the cheeks, part of the tail and the back of a wing, I let it set, and decide that this will be just fine!

So, on to primer!

Once you're ready for primer, there are several choices. I am a fan of brush on primer, because of it's convenience and drying time. There's no right or wrong primer to use...the important thing it to use it right. Since Puffcloud is blue, I use a white primer.

Often times a brush on primer will require several coats, compared to a heavy, single coat of a spray on.


Only two coats so far...but it already looks far more uniform!

Next: basing and base paint coat!

August 24, 2011

Puffcloud Custom Blind Bag - Part 2

Okay! On to part two.

Bare with me on this portion, guys! This is a hard part to make any sort of a tutorial about.

Last time, we pared down the plastic to make room for some sculpting. There are many kinds you can use. Personally, I like to use Grey Stuff for the modifications.

The top name brand of Grey Stuff is pro-create, but any two-part epoxy putty will do - Apoxie Sculpt, Green Stuff, Brown Stuff. They all have different properties, but I will go into that in a separate post!


When using epoxy putty, you will only have a certain amount of time to work with it...this varies depending on the mix you've created and what you are using.

To sculpt, you will need your fingers to be moist. Water will do fine, some people prefer vaseline!


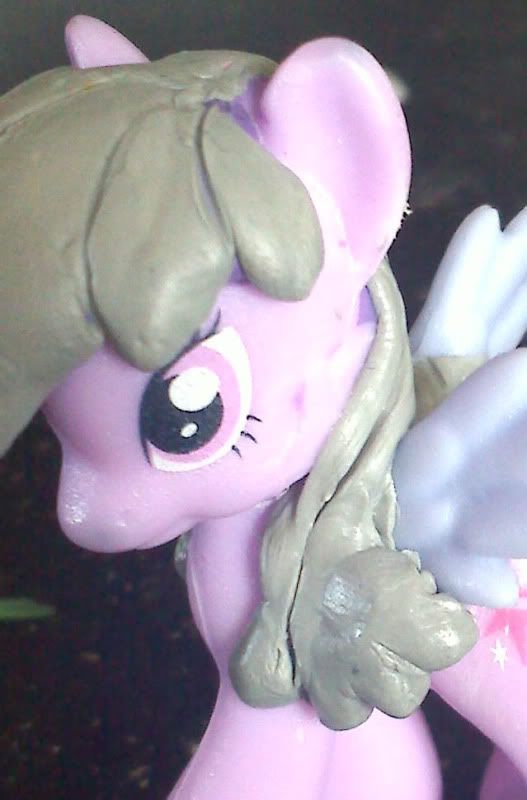
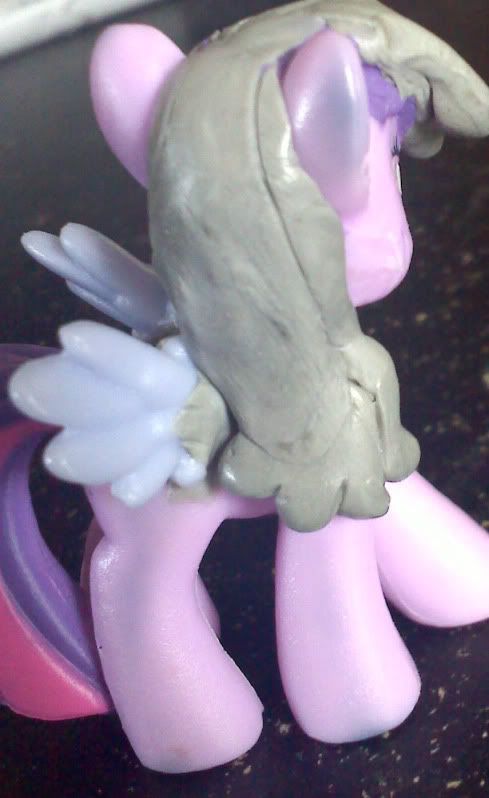
After reviewing Puffcloud's character picture, I decided to try using the extra Lily Blossom wings I had from making Lyra! Since I had to destroy Twilight's mane on this side of the body, I used the grey-stuff for her mane to help support the wings.


At this point, I'm not worried if things look rough. After the putty sets and hardens, it can be filed down. But it's best to try and make parts as thin as possible near the seams - by wetting your fingers and stroking in one direction, you can easily thin out putty.

I then patched up the area on top of Puffcloud's hair, and begin to build up her hairstyle.

I smoothed up the design, working off of the pictures, and let the rest set to dry!

Again, don't worry about how rough things look at the start - there's lot of work to be done!

August 21, 2011

Puffcloud Custom Blind Bag - Part 1


Several people have asked for tutorials. I'll compile a more comprehensive, finished version later, but we may as well get started!

Today, I started with the first step of blind bags - trimming!

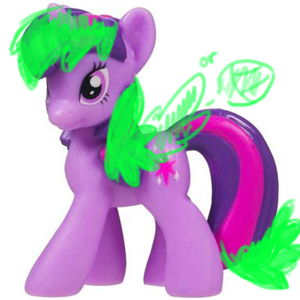
The first thing you'll want to do is figure out what base you'll be using, and the changes you'll be making. Usually you can do this in your head, but to illustrate I've done a mock up of the changes that will need to be done to make Puffcloud.

Puffcloud requested the pony be made from a Twilight base - but she's a pegasus!

This will be hard, but not impossible. First, the mane and tail changes will require some work, but won't be too hard. Her wings will have to either be closed (I make these from pro-create, a.k.a. greystuff) or open (there are some spare Lily Blossom wings I have from my custom Lyra). I haven't yet decided which to use.


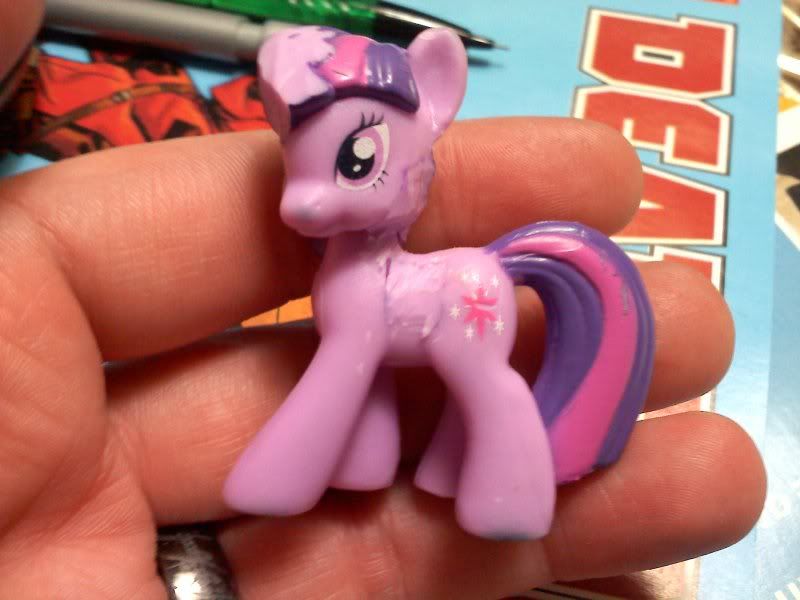
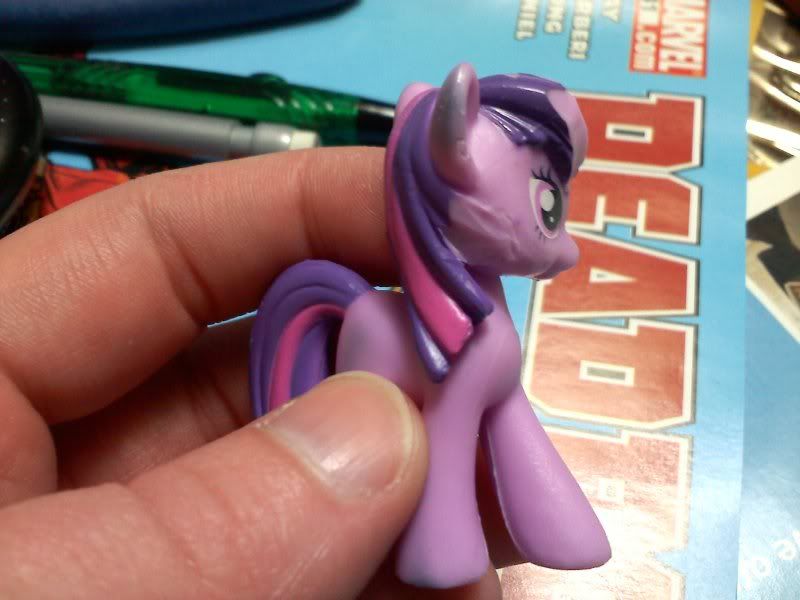
Now that I have a good idea of what I need to do, I begin paring down parts that will get in the way. Twilight has parts of her mane that would overlap the mane I planned, so the easiest thing at this point will be to do away with all of it I can.

For this I use an exacto knife that is older, so is a little more dull. It's dangerous to use what is essentially a razor blade, but it cuts through the vinyl easily. A knife meant for whittling may work as well.
In the early stages this looks rough, but some sandpaper and some more whittling should get rid of most problems. What can't be fixed with that I will repair with green stuff - so don't be afraid of making a few mistakes with the knife. As long as you have the right materials, it can all be fixed.

Stay tuned for more!