After priming Puffcloud, I mixed up her base paint coat. A good rule of thumb is to set aside some of your base paint color in a container that will keep it moist. If you make a mistake further down the line, you will want to be able to fix it without having to try and match up a custom mixed color.
You can see what I mean when I say the white primer is a little grainy. With a little work, tweezers and paint the issue is completely fixed...this is the only downside to reaper brush-on white. The black does not have this flaw.
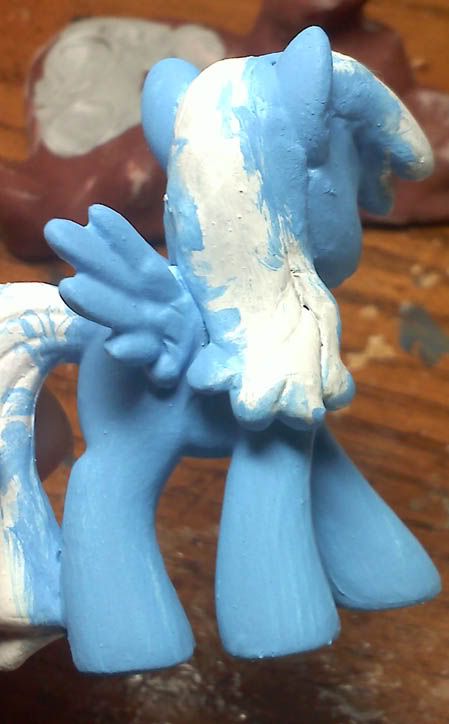
For blind bags I can't stress enough how much it requires primer. Paint will run off of it unless it is now thinned.
Speaking of thinning, now is the time to thin your paint! Make sure you do so as you are mixing your color. Some paint product are milky, not clear, and this can affect the color if you don't take it into consideration.
Starting with the lowest layer (usually the body), begin layering several coats of paint. Thin them and wait for each layer to dry...if you try to put more paint over a layer still firming you might end up with brush marks.
Sometimes, a warm light will help speed up the drying time.
 Make sure that as you layer up you get hidden spots. With the ponies, often behind the legs and between them can be harder to get coverage on.
Once your base coat is sufficiently thick and appears to be the level of coverage you're looking for, it's time to move on to the next layer - the mane.
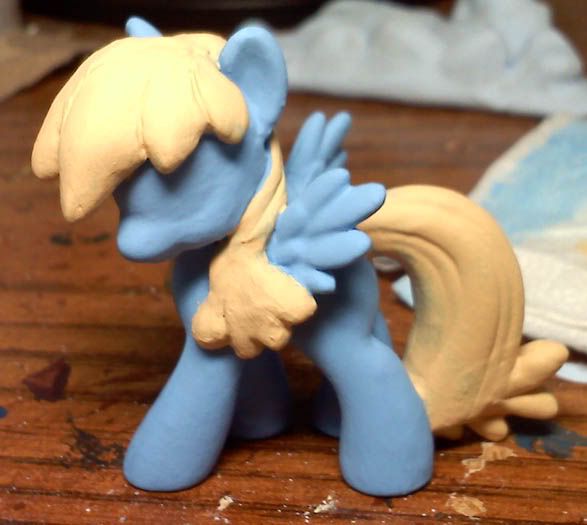
Mix up your color, incorporating the thinner into it, and make sure to set some extra aside in a container! You might not be able to tell, but Puffcloud's mane contains purple. Be creative with your mixtures...sometimes a color you wouldn't expect will help to get the shade you want.
Like the base coat, work it up slowly with thin layers until you get the coverage you like. Expect there to be some paint loss if you handle this with your hands...that set aside paint will be very important.
Now, onto the eyes -
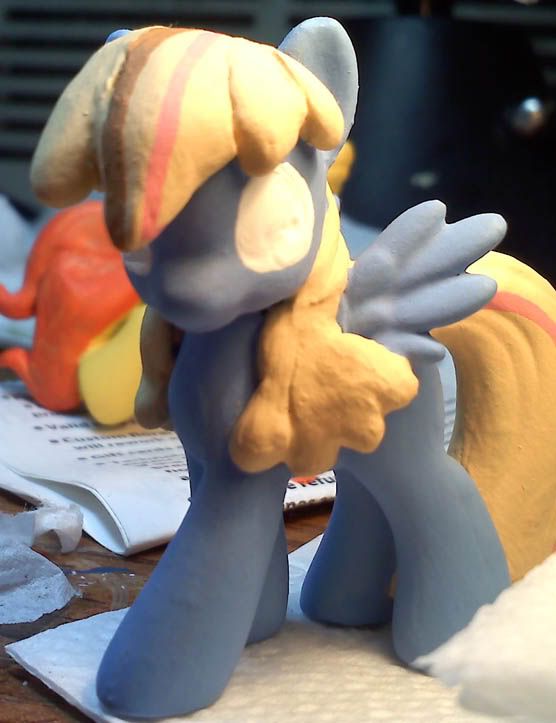 When I do eyes, as you can see I completely ignore the eyes that figure comes with. If you want a more show accurate figure, try to make the eyes larger than the blind bags have. In this case, I'm using the picture of Puffcloud here for reference as to her eye size - and taking a little creative liberty to make it appear best on the figurine.
Start with white paint, and using your brush paint the shape of the eyes and fill it. This is a good reason to have backup paint for your base coat - if you make a mistake, and shape it wrong, use this paint to correct your mistake.
An important part of this is to make sure that your figure's eyes line up from a front view as well as a side view. This is another reason bigger is better than smaller on these little ladies...bigger eyes look more show-accurate from the front.
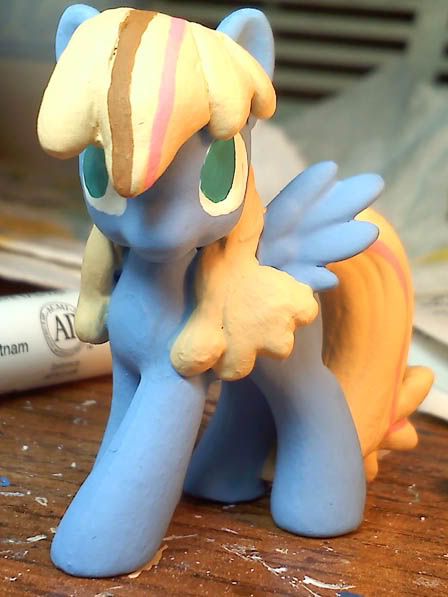 Following this, decide what expression you want your character to have. I cannot reiterate enough to look at screenshots from the show of the expression you are attempting - the ponies have very specific designs, so if you vary too far you can make an enthusiastic pony look psychotic without even trying.
Using your pony's base iris color, fill in the eyes with a ratio you decide you like. Try to make this look as circular as you can, don't be afraid to use white to go over this if necessary and to fix your mistakes. Now's the time to do that, before you get too far!
The remaining eye tutorial - and finishing touches - coming soon.
Do you have a supplies list?
ReplyDeleteActually yes! It's over on pandastarcustoms.blogspot.com/2011/09/puffcloud-custom-blind-bag-paint.html
Delete