Onto the eyes!
 When you are working on eyes, remember - smaller brushes are better, but also beware of ones that are too small. If you get one that is too small, the bristles may easily come displaced...and that makes accuracy harder to come by. Do some test eyes on paper, if you're unsure of the size to use. The last thing you want to do is make a big mistake and start all over!
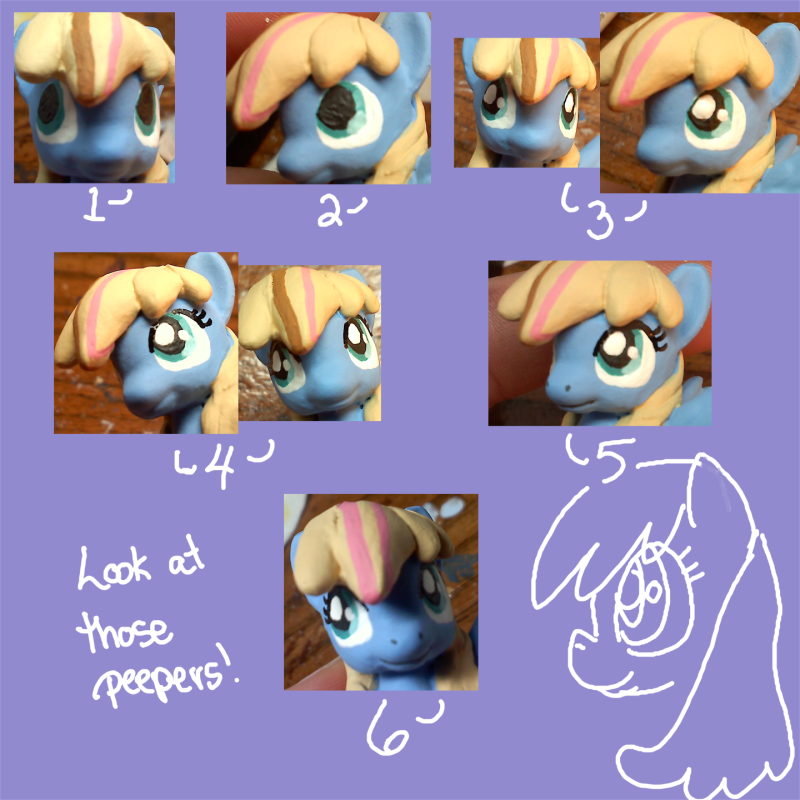
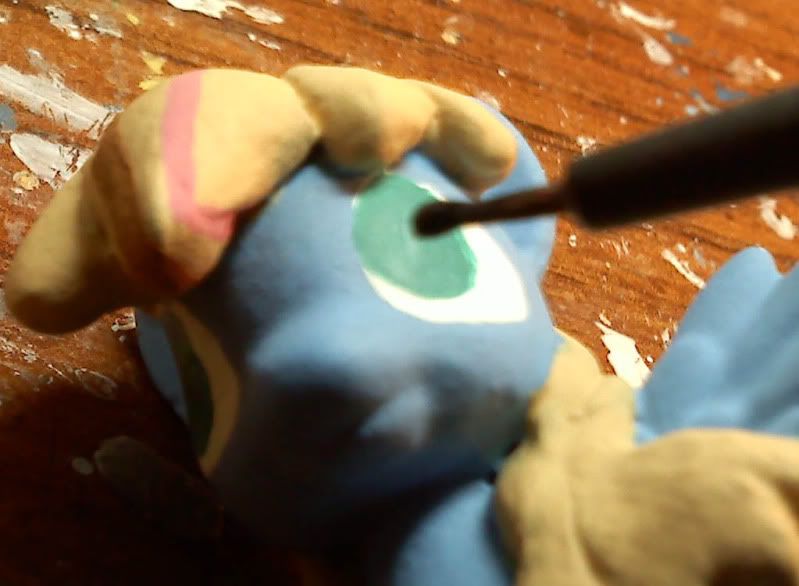
Next, let's follow the chart - I tried to make sure to take pictures of the process, so that it's a little more clear as to what to do:
Step 1: The first thing I do is the pupils. On ponies, the pupils are very large, so use reference pictures! Make sure you have full coverage for the black, and do your best to smooth out the edges. If you make a mistake, use some of that eye color you saved earlier (Useful, right?) and make fixes once the paint dries.
Step 2: Highlights in the eyes are next. I prefer not to use the shadows that the show has at the top of the iris, but you certainly can if you think it looks better! Using white, I created a two lighter shades and layer them next to each other at the side of the eye.
Step 3: The eyes will look pretty dead until this part. Using reference and white paint, create the light reflections on the pony's eyes. Make sure to follow the expression you reference - most of the time, the reflections will be on the same spots on both eyes.
Step 4: Now it's time for the Sharpie extra-fine oil paint marker. You'll want to lightly press on the tip on paper until paint bleeds out, and make sure you have a controlled line. If you're even a little too hard on the Sharpie, it can begin to uncontrollably bleed - so treat it with care! Working off of your pony's eye shape and type, carefully draw out first the outline, then the eyelashes. If you can't reach a spot, don't force it - you might mark an area you don't want marked.
Step 5: Using your small brush, dip it lightly in black, and very carefully paint the areas you could not reach with the pen. Though the pen is a shiny paint, once everything is varnished you won't know they were done using different tools. Use this to fill any gaps.
Step 6: Look at the eyes from all angles, and if necessary use any of the colors you've saved to correct any errors. If you've saved colors, you'll have everything you need to fix your errors without completely re-starting the eyes.
Now, the eyes are finished!
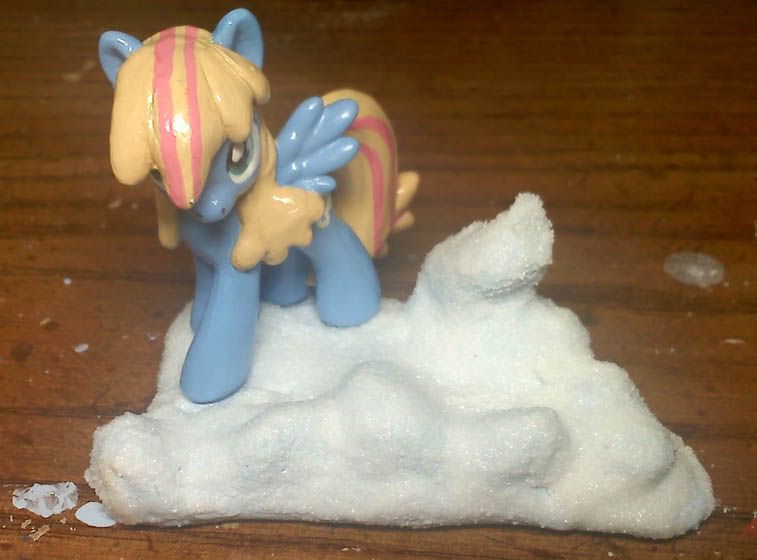
At this point, when I was working Puffcloud only a few more things needed to be done. After working with her for detail clarification, I made some changes to her mane colors. The final piece on the pony herself is then the cutie mark.
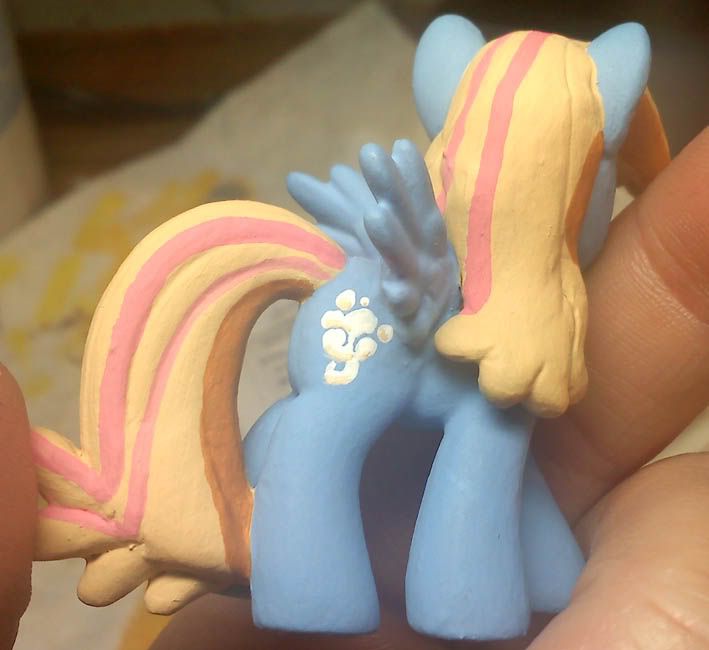
It's hard to explain the cutie mark, since it varies from figure to figure. But you need to get creative, and think careully if you're dealing with a detailed one.
In Puffcloud's case, since I had no more spare blue paint (I left it uncapped after following my own advice! :( ), I had to do the blue lines separating the clouds another way. So I used negative space, starting with only dots of white paint and working upward, making sure to leave lines between the areas it needed. Then, I shaded the necessary areas. If you're careful, you can get a lot of details in on these babies.
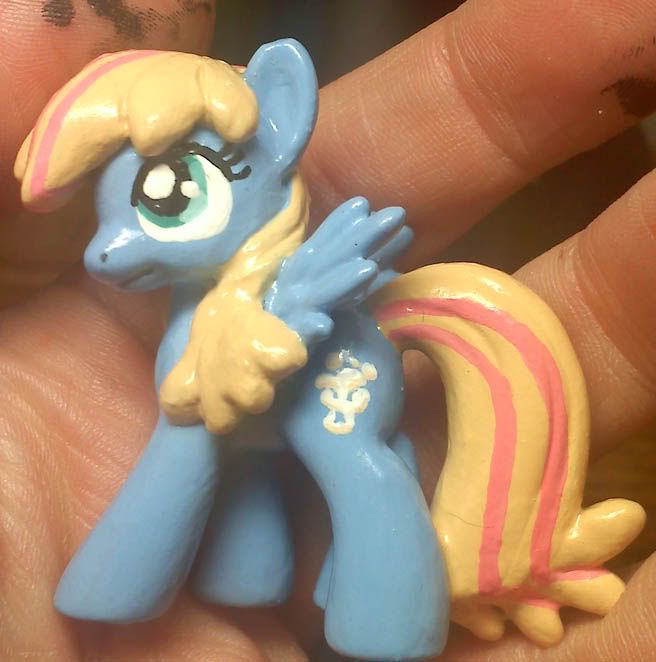
...at this point, the only thing left to do is varnish!
 (Paint fingers!)
I prefer to use a satin varnish, but you might choose to use a matte/dull varnish. Matte varnish definitely photographs better, but satin looks very vibrant in person.
When applying it, make sure to do so evenly and do not be afraid to add several coats. Just make sure you have changed your water since painting. If you haven't, you might have a disaster on your hands!
 We're almost done...but not quite! Next, I will cover how to base a figure, as well as the construction of an accessory to finish out the figure!
Very nice work :)
ReplyDelete